
By now, I’m sure you’ve seen our Five Gallon Bucket seats page here, where we show
you how to easily turn a five gallon bucket into a seat that you can bring with you to go camping. We’ve also shown you how to easily build a minimalistic design for a concrete chair out of a five gallon bucket. Today, we’d like to show you another kind of seat you can make at home with a five gallon bucket. This kind of seat is the Ottoman.
You can comfortably sit on the Ottoman, but they’re also great to rest your legs on. The nice thing about an Ottoman compared to a regular couch is that you can generally use them as a storage space too. You can buy plenty of great Ottomans on Amazon. Personally, I’m quite fond of this one:

That will set you back quite a bit however, so why not make one yourself? You might have seen our own attempt at an Ottoman, but if you have more than ten seconds to invest, stay with us and follow this guide on how to make a great Ottoman yourself!
https://www.youtube.com/watch?v=1glCjcWSaV0
Materials you need:
-A sewing machine (optional but recommended, a needle works too)
-Elastic
-A bucket (learn how to get one for free here)
-Pillow filler material, get cheap recycled filler here!
-Some nice fabric. I like this fabric, but your taste may differ.
Here’s what you do:
Step 1: Use a pencil to trace a circle half an inch larger that the lid of your bucket.
Step 2: Fold over the fabric and pin the sides together.
Step 3: Use scissors to cut out the circle.
Step 4: Sew the two sides of the circle together, but leave a gap of around 3 to 4 inches, that you can use to stuff the pillow. When you’re finished sewing, turn the pillow inside out.
Step 5: Put the stuffing you’re planning on using into your pillow. After you get it all in, sew up the remaining part of the pillow that you left open.
Step 6: Measure the circumference of the widest part of your bucket, then add an inch to that for the seam. That’s how wide the fabric you’ll have to cut out will be. To measure how long your fabric will need to be, measure out how tall your bucket is and add 5 to that inches. Draw these distances on your fabric and cut it out.
Step 7: Fold over the bottom of your fabric on the long part of the fabric, to create the spade where you will feed elastic through, pin it up, so that you can prepare to sew it.
Step 8: Use the lid of your bucket to trace a circle on the fabric, to measure how big you want the top of your bucket Ottoman to be. The circumference should be roughly equal to the long side of the rectangle you just cut.
Step 9: Sew up the bottom seam of the fabric, keeping space for the elastic.
Step 10: Sew the two parts together.
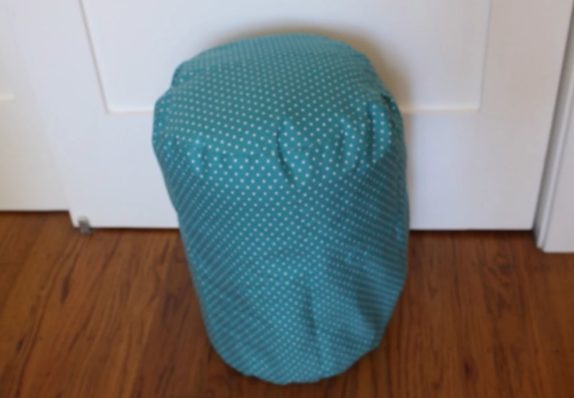
Step 11: If you put the fabric and the pillow over the bucket, the Ottoman should be ready. Whenever you want to pull something from the bucket, you remove the pillow and the fabric. You thus have a couch that effectively conserves space.
Hopefully you like this guide. It should be quite simple for you to use an old five gallon bucket, ideally one you got for free, and turn it into an Ottoman to sit on. You will have a house with good furniture at a low price, that suits your own taste.
If you decide to go ahead and create your own Ottoman, using this method, we’re always very happy to see the result. If you’d like to show off your home-made Ottoman, just send us an email and with your permission we’ll place the photographs on this page!